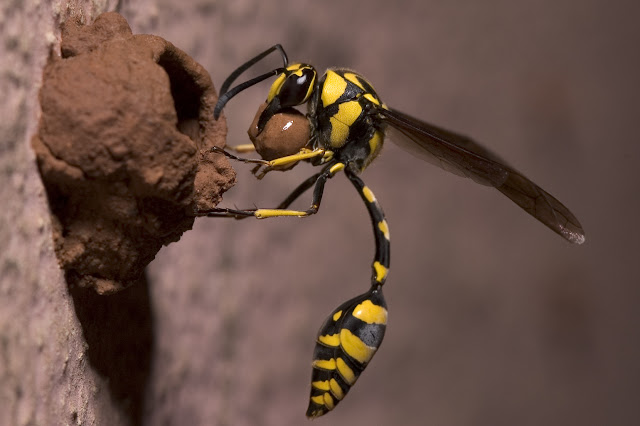
Respost for folks from Reddit.
Here's some sense of how the whole process goes. The series also gives you an idea of how long I spent on getting these images. Its only towards the completion of the second or even third pot that I got what I wanted. I think it took a week I think before I nailed the lighting and focus.
I wanted the wasp completely in focus, so absolutely parallel to the lens plane. So I watched it to figure out its behavior and realized it would hover in front of the pot for just a couple of seconds before landing. So I rigged the tripod to be just low enough to be eye level to the wasp and just parallel to its incoming flight path.
My only light source was either natural light or my handheld manual Vivitar 5000. I did have an extension cable at least. Initially I just worked on getting the exposure right so I got nice wing blur but a stable insect. You can see their bodies are quite still, even when their wings move.
Then I worked on getting enough light on the wasp and on the wall behind the wasp. If you held the light parallel to the wasp body, the light on the wall fell off very fast and the right edge of the image was too dark. Not to mention the ugly shadow of the pot either below or beside the pot (See images 2, 3 and 4). I didn't have a second flash to do a fill light. (I was a poor grad student then.)
So the light had to be held just so. Once the wasp was hovering, the ring-light was held behind it so the insect was in its centre. And the light was tilted towards the wall, so off at an angle to the wasp and pushing more light to the wall, behind the pot. The light is also slightly above the wasp, pointing down a bit as you can infer from the specular highlights and shadows. This last part wasn't necessarily intended, but altogether it worked. The image hangs together
As you can see there is still some fall off on the wall and the front of the mud ball and the face of the wasp is not as highly lit as the thorax and abdomen. But both those are acceptable compromises. The image hangs. And that is how I made this image. I didn't click it, I didn't snap it, no, no, I stalked it and I made it.
 |
| Bring mud to make pot |
 |
| Shape pot out of the mud brought in |
 |
| Stock the pot with alive but paralysed soft bodied prey like caterpillars and spiders. |
 |
| Lay a single egg and seal the pot. See sealed pot in image no 1. |
1 comment:
Congrats!
Have a potter wasp building a nest at home right now. They are amazing creatures.
Post a Comment